Say hello to the slickest PowerPoint animations you’ve ever seen.
No, this is not a blog about the little clay guy from the 70s. In fact, he’s no longer an animation at all, he’s now a transition.
The PowerPoint Morph transition tool is only available to those lucky enough to have PowerPoint 2016 (both Mac and PC), but if you’re one of the privileged few, you are in for a treat.
So, what is Morph for PowerPoint?
Morph can be used to fake really complicated animation effects within PowerPoint. It’s next-level animation, but technically it’s a transition. Morph can transition any object you can imagine – within PowerPoint, let’s not get carried away – across slides, seamlessly morphing into its next-slide counterpart.
Morph can create impactful animation effects without the time and effort of animation effects, and it can also be used to create cool parallax effects.
So what does all this Morph business look like for real? Here’s one we made earlier.
And here’s what it looks like in the edit window.
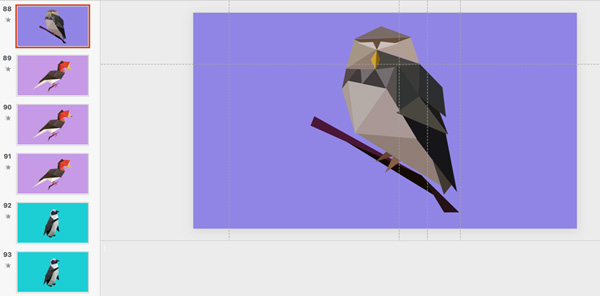
See, lots of separate slides, which transition together to create what looks like one animation. Super cool, I know.
I don’t want you to think you can’t use Morph just because this example looks a little complicated. By the end of this article, you’ll have all the tools you need to get started.
How to use the PowerPoint Morph transition
Morph recognises objects that are similar to one another across your chosen slides, and creates the simplest path.

While it tries to put two and two together visually, Morph also takes object names into account, and can easily end up coming out with five. This is why we’ve got a fool-proof way (I’m not calling you a fool, I was looking at the guy behind you) of using Morph so that it doesn’t get its little self all muddled.
The easiest way to make sure PowerPoint morphs into the object you want it to become is to copy the shape from one slide to the next slide, and then edit it into the new shape. That way the link is made, no confusion. Then, simply rinse and repeat until your slides are resembling a static flip book, or a movie storyboard.
Once you’ve created your slides, select all the slides in the series (except the first) and choose Transitions in your toolbar. Then, just click Morph to apply it to all.
Click into Slide Show mode and watch the magic unfold.
When put like this, it does sound really easy, but I don’t want to lead you astray. I respect you too much. Honestly, it takes a little practice, a little trial and error, but you’ll get there.
Once you’ve mastered the basics, the possibilities are numerous. You’re not limited to just moving from a circle to a square. Here are a few suggestions to play with:
Change the positioning using Morph in PowerPoint
Morph can move objects around the slide seamlessly, both vertically and horizontally. They can also morph on or off the slide, which creates really smooth fly in/fly out effects. As if that wasn’t enough, they can also rotate. Spin them right round baby, right round.
Two slides set up like this…
…can create this

Change the size using Morph in PowerPoint
Objects can be scaled and stretched, becoming both bigger and smaller. Morph is a great tool to use for this, because any animation you try to apply for the same effect will not be as smooth and clear as Morph.

Change the colour using Morph in PowerPoint
You can move between different colours, gradients, and even filters using Morph. Creating the same effect with animations would be unbelievably time consuming. You’ve got better things to do, I’m sure.

Change the text using Morph in PowerPoint
Don’t forget about the other PowerPoint objects while you’re playing with your shapes. Morph can adjust text size between slides, or even the structure of entire paragraphs. Just make sure to not change any of the copy within the text box. That is asking way too much of the current version of Morph… maybe next year.
Setting your text up like this…
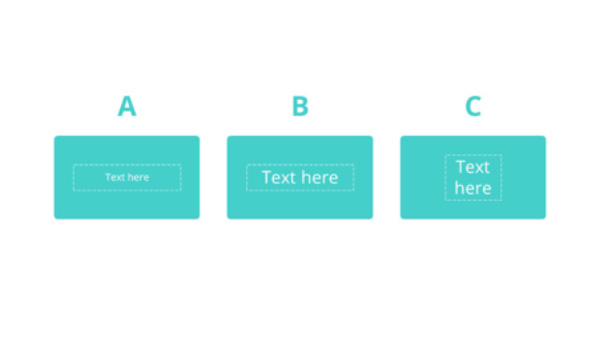
…leads to morph creating this:

A few final thoughts
Think of Morph as a mother of octuplets. She’s already taken on a lot, and she’s tired and she has food down her best skirt. We cannot blame her for, sometimes, getting her kids mixed up. They just look so damn similar.
Give her a helping hand by not offloading your own children on to her. In this metaphor, your children are additional entrance and exit animations. But they are the most beautiful entrance and exit animations. Simply stunning.
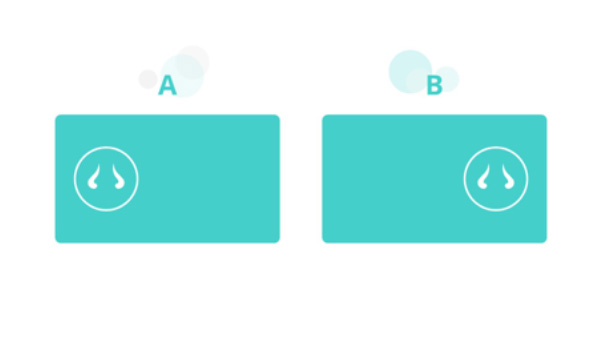
For example, on two slides that use a Morph transition, don’t add any exit animations to slide A. Similarly, don’t add any entrance animations to slide B. This is the quickest way to send her over the edge.

You also want to keep an eye on your layers. If an object on slide A sits on top of another object, but when it Morphs across to slide B, it is suddenly below it, Morph will jump it right back up again. Mostly, this tired mother just wants you to be methodical and consistent when building your slides. That’s all she asks.
Getting to grips with Morph can feel like an uphill struggle at first, but if you follow these rules and learn to understand how she sees the world, it will all morph nicely into place.

