Reduce slide noise, make content pop, create hierarchy and utilise beautiful imagery. You really can have it all. This is how to make an image transparent in PowerPoint.
Achieving a delicate balance between all the elements on your slide can be one of the hardest things to do when it comes to presentation design. You want your message to come across clearly, but you don’t want to use blank, boring slides to do this. You have stunning imagery you want to showcase, but your data also needs to shine. How do you create impactful design without distracting from your story?
You can have it all, with a really simple trick and without having to leave PowerPoint. In this article we’re going to talk you through how to make an image transparent in PowerPoint in short, simple steps. But first, we’ll show you when and why you might use this trick.
Transparent images: tips for application
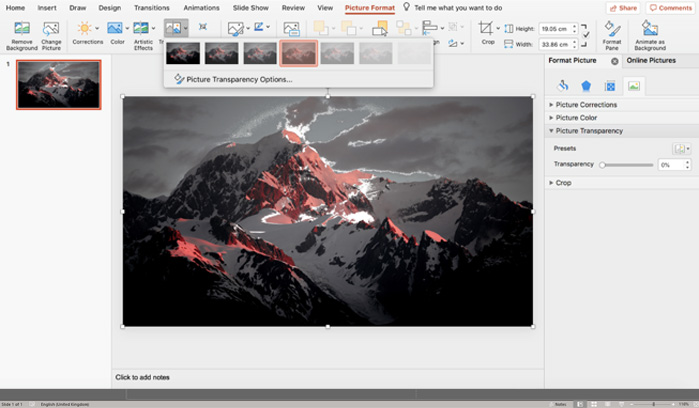
In the studio, we use image transparency in PowerPoint when we want to amplify the message that is on the slide, or create a compelling visual composition by adjusting the image to suit our purposes. As a general rule, the heavier your content on slide, the less noise you want to create by adding a background image as well. The first step is to choose the right image. If you already know there’s going to be conflict with the on-slide elements, try to stick to clean, minimal imagery. Here are some examples of using image transparency effectively:
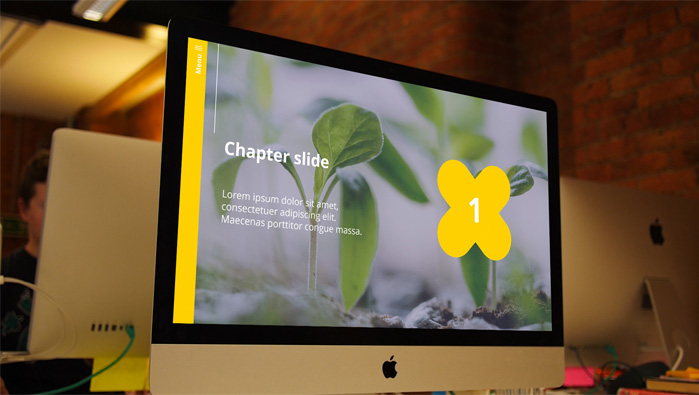

As you can see, transparency impacts legibility, so it is important to make sure you can still read your copy. Notice we used a slightly busier image for the first example, where there is very minimal copy, but when the hero of the slide is a complicated diagram, the image we chose is a lot less complex and prominent.
Bear in mind the final destination for your presentation before you implement this technique. While image transparency works beautifully on high-resolution screens, your carefully-crafted composition may not translate to presentations viewed through a projector, or when printed.
Once you’re sure this is the right path for your presentation, applying the transparency couldn’t be easier.
How to adjust image transparency in PowerPoint
For PC users:
- Select your image
- Click on Format, then select Transparency
- You will be given six options: 15%, 30%, 50%, 65%, 80% and 95%
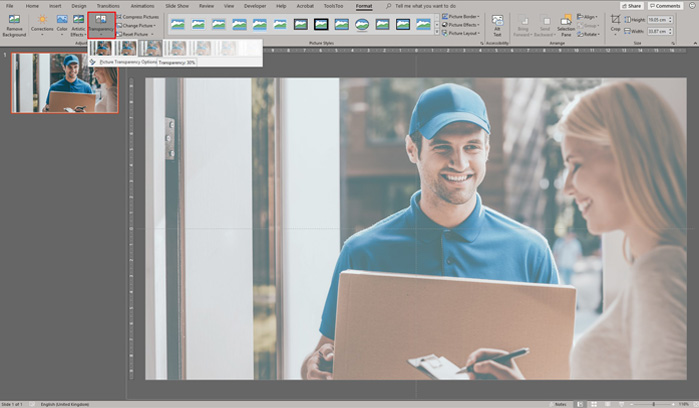
If you’re happy with one of these, simply select the appropriate option. For more control, click on Picture Transparency Options. On the right side, you will be able to manually change the transparency level, from 0 (fully opaque) to 100% (fully transparent).

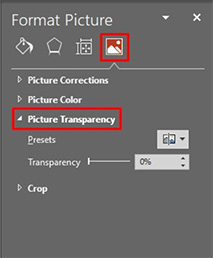
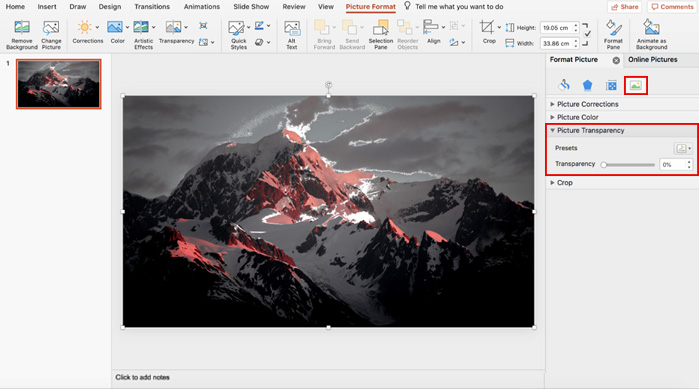
On a Mac:
- Select your image
- Click on Picture Format, then select Transparency
- You will be given six options: 15%, 30%, 50%, 65%, 80% and 95%
If you’re happy with one of these, simply select the appropriate option. For more control, click on Format Pane. On the right side, click on the image icon and then select Picture Transparency. You will be able to manually change the transparency level, from 0 (fully opaque) to 100% (fully transparent).
Once you’ve perfected your image adjustments, try experimenting with block colour overlays of varying transparencies, to add depth and inject brand personalisation into your image backgrounds.
Layering slide elements is an advanced PowerPoint technique that can elevate your presentations. Using our tips and tricks, you’ll have beautifully balanced slides in no time.

