
How to customise your Ribbon and Quick Access Toolbar to suit your presentation preferences and make your life easier.
Formatting a PowerPoint presentation can sometimes feel like a mind-numbing exercise in repetition. And with such a wealth of features available in this software, it’s no wonder the ones you want are always buried deep in your Ribbon. PowerPoint isn’t trying to make this painful for you; you’re making it painful for yourself and you didn’t even know. Stop struggling and start adapting your Ribbon and your Quick Access Toolbar to always have your most commonly-used commands to hand when you need them.
What’s the difference between the Ribbon and Quick Access Toolbar?
The Ribbon is the row of tabs, and corresponding layers of commands, that sits across the top of every PowerPoint screen, allowing access to every glorious feature PowerPoint has to offer, but sometimes taking a few clicks to unravel.
The Quick Access Toolbar is situated right above the main Ribbon and can provide speedy access to any command you add, with just one click.
By customising your PowerPoint set up, you will save valuable time, work more efficiently, and be able to use your energy elsewhere.
How to customise your Ribbon in PowerPoint
Whether you’re on a Mac or PC, the process is mostly the same, just with a few tweaks. The first of these tweaks occurs in the very first step.
On a PC:
Select File, click Options and then choose Customize Ribbon.
On a Mac:
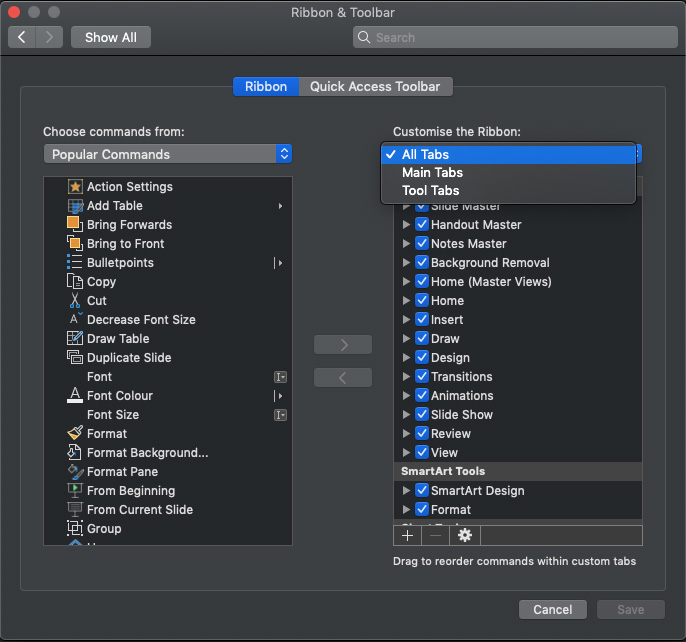
Select PowerPoint, then Preferences… followed by Ribbon & Toolbar and finally click into the Ribbon tab.
Mac and PC users alike will see a long list of commands on the left, and on the right is where you tailor your tabs and the commands within them.
You can hide any of the current tabs, add more tabs, and rename and organise them in the order you wish.
How to customise your Quick Access Toolbar in PowerPoint
Customising your Quick Access Toolbar is almost exactly the same as customising your Ribbon. Once you’ve navigated to File and Options, on a PC, or PowerPoint, Preferences… then Ribbon & Toolbar on a Mac, this time choose Quick Access Toolbar.
You’ll see two columns, similar to before, however, this time there are no tabs to deal with, so you can simply select your command and add, without having to arrange tabs or create new groups.
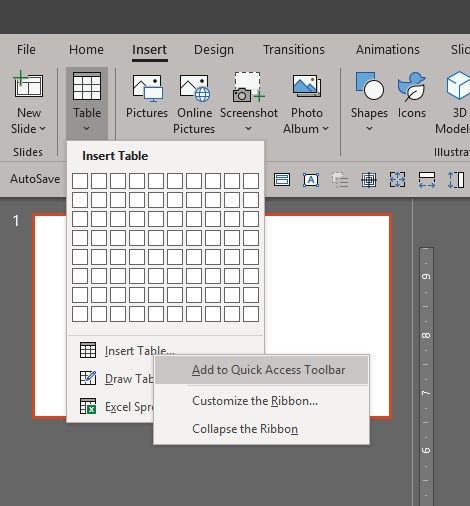
For a quicker way to add commands to your Quick Access Toolbar (if you’re on a PC), you can right-click any command in your Ribbon, and select Add to Quick Access Toolbar.
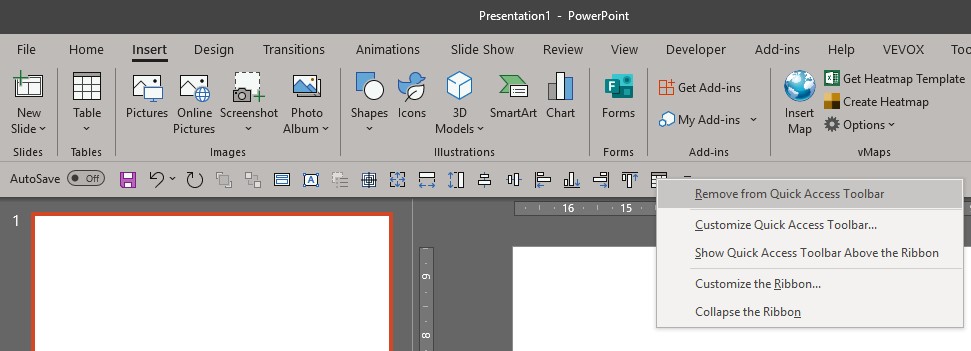
If you later want to remove the command, simply right click it and select Remove from Quick Access Toolbar.
Here in the Buffalo 7 studio, we use a lot of formatting and building tools on a day-to-day basis, so some of our favourite shortcuts are the Alignment and Distribution tools, as well as the Send to Back and Bring to Front commands. We’d recommend selecting any of your most commonly-used tools, as well as anything that is more than two clicks into the Ribbon. When you make changes to your Quick Access Toolbar, these only take effect on your computer – so adjust to your heart’s content, without having to compromise with your colleagues.
Whichever your go-to PowerPoint tools are, add them to your Ribbon or Toolbar and go to them so much quicker.

